Paper Handling Menu
When paper handling settings are correctly configured through the
control panel, you can print by choosing the type and size of paper
from the printer driver or software application. For more information,
see “Printing by type and size of paper (locking trays)” on page 70.
Some items in this menu (such as duplex and manual feed) can be
accessed from a software application, or from the printer driver (if the
appropriate driver is installed). Printer driver and software application
settings override control panel settings. For more information, see
“Using features in the printer driver” on page 65.
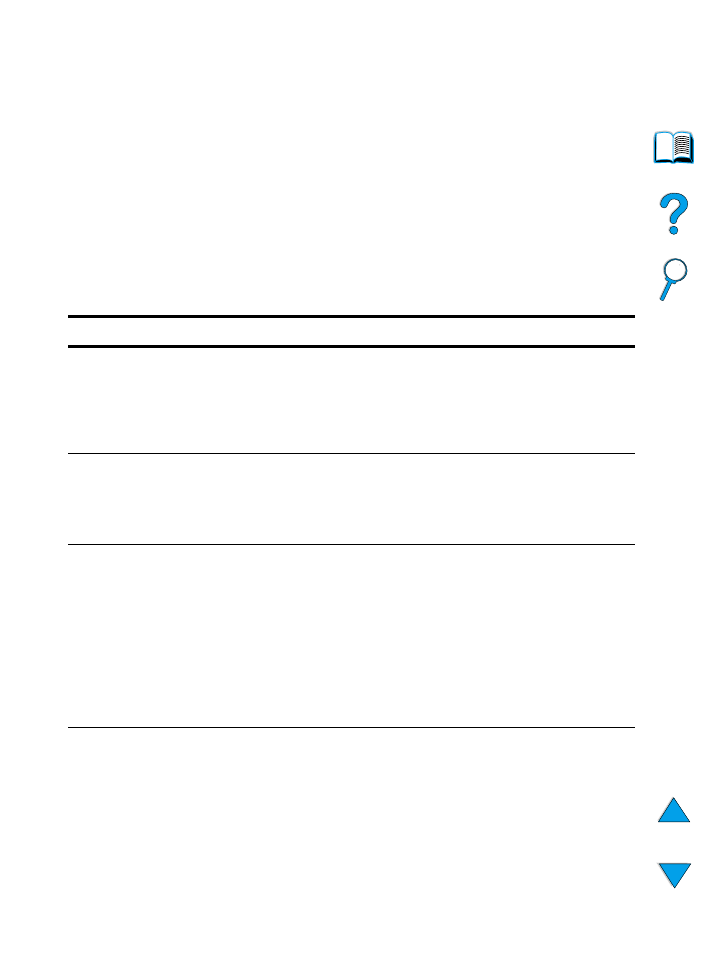
Paper Handling Menu
Item
Values
Explanation
ENVELOPE FEEDER
SIZE=COM10
For supported
paper sizes, see
“Supported sizes
and weights of
paper” on
page 189.
This item appears only when the optional
envelope feeder is installed. Set the value to
correspond with the envelope size currently
loaded in the envelope feeder.
ENVELOPE FEEDER
TYPE=PLAIN
For supported
paper types, see
“Supported
types of paper”
on page 192.
This item appears only when the optional
envelope feeder is installed. Set the value to
correspond with the envelope type currently
loaded in the envelope feeder.
TRAY 1 MODE=
FIRST
FIRST
CASSETTE
Determine how the printer will use tray 1.
FIRST
: If paper is loaded in tray 1, the printer
will pull paper from that tray first.
CASSETTE
: A paper size must be assigned to
tray 1 using the
TRAY 1 SIZE
option (the next
item in this menu when
TRAY 1
MODE=CASSETTE
). This allows tray 1 to be used
as a reserved tray.
For more information, see “Customizing tray 1
operation” on page 69.
TRAY 1 SIZE=
LETTER
For supported
paper sizes, see
“Supported sizes
and weights of
paper” on
page 189.
This item appears only when
TRAY 1 MODE=
CASSETTE
. Set the value to correspond with
the paper size currently loaded in tray 1.
EN
Paper Handling Menu 211
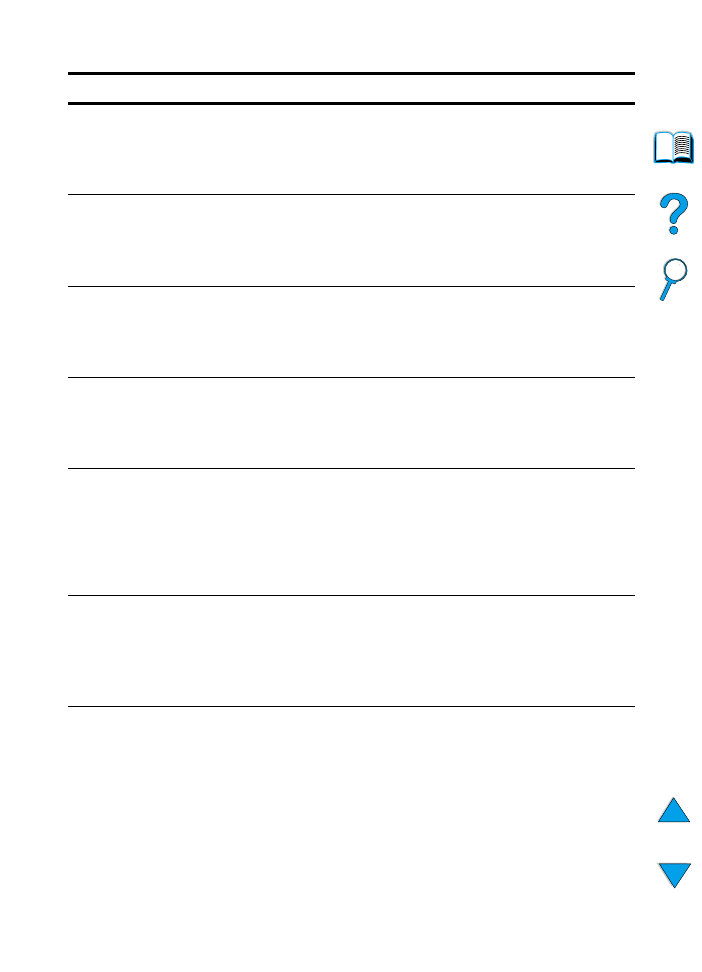
TRAY 1 TYPE=
PLAIN
For supported
paper types, see
“Supported
types of paper”
on page 192.
This item appears only when
TRAY 1 MODE=
CASSETTE
. Set the value to correspond with
the paper type currently loaded in tray 1.
TRAY 2 TYPE=
PLAIN
For supported
paper types, see
“Supported
types of paper”
on page 192.
Set the value to correspond with the paper type
currently loaded in tray 2.
TRAY 3 TYPE=
PLAIN
For supported
paper types, see
“Supported
types of paper”
on page 192.
This item appears only when an optional third
paper tray is installed. Set the value to
correspond with the paper type currently
loaded in tray 3.
TRAY 4 TYPE=
PLAIN
For supported
paper types, see
“Supported
types of paper”
on page 192.
This item appears only when an optional fourth
paper tray is installed. Set the value to
correspond with the paper type currently
loaded in tray 4.
MANUAL FEED=OFF
OFF
ON
Feed the paper manually from tray 1, rather
than automatically from a tray. When
MANUAL FEED=ON
and tray 1 is empty, the
printer goes offline when it receives a print job
and displays
MANUALLY FEED
[PAPER SIZE]
.
For more information, see “Manually feeding
paper from tray 1” on page 71.
DUPLEX=OFF
OFF
ON
This item appears only when an optional
duplexer is installed. Set the value to
ON
to print
on both sides (duplex) or
OFF
to print on one
side (simplex) of a sheet of paper.
For more information, see “Printing both sides
of paper (optional duplexer)” on page 49.
BINDING=
LONG EDGE
LONG EDGE
SHORT EDGE
This item appears only when an optional
duplexer is installed and the duplex option is
on. Choose the binding edge when duplexing
(printing on both sides of paper).
For more information, see “Layout options for
printing both sides of paper” on page 52.
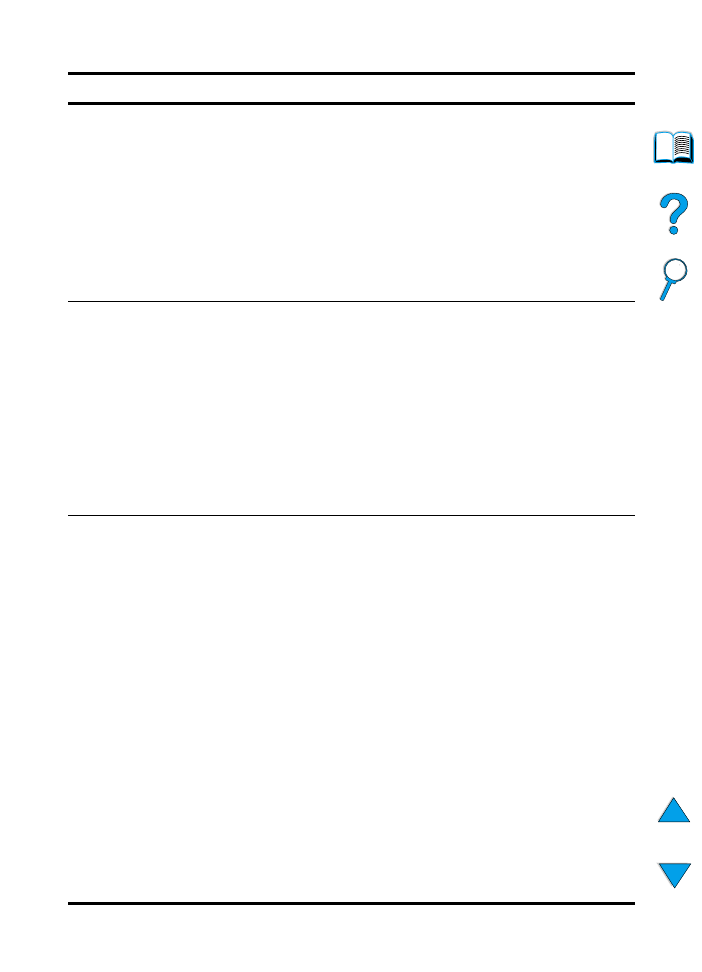
Paper Handling Menu (continued)
Item
Values
Explanation
212 Appendix B - Control panel menus
EN
SMALL PAPER
SPEED=NORMAL
NORMAL
SLOW
Select
SLOW
when alternately printing
envelopes (or small paper) and standard paper
sizes and print problems appear.
Be sure to return the speed to
NORMAL
when
finished.
When slow is selected, the printer briefly
pauses between pages to reduce a repeating
image defect (see “Repeating image” on
page 134).
For more information, see “Printing envelopes”
on page 55.
CONFIGURE FUSER
MODE MENU=NO
NO
YES
Configure the fuser mode associated with each
paper type. (This is only necessary if you are
experiencing loose toner problems printing on
certain paper types.)
NO
: The fuser mode menu items are not
accessible.
YES
: Additional items appear (see below).
Note
To see the default fuser mode for each paper
type, select
YES
, scroll back to the Information
Menu, and print a menu map (see “Information
Menu” on page 208).
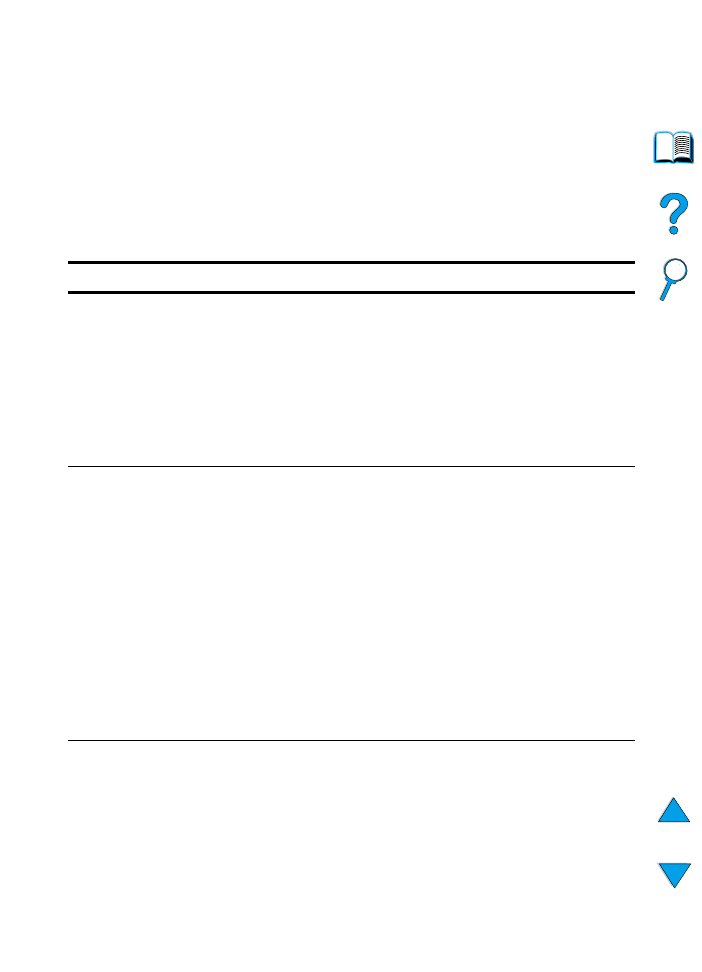
[TYPE]=
NORMAL
NORMAL
LOW
HIGH 1
HIGH 2
This item appears only when
CONFIGURE
FUSER MODE MENU=YES
. Most paper types are
set to
NORMAL
fuser mode by default. The
exceptions are as follows:
ROUGH=HIGH 1
TRANSPARENCY=LOW
NORMAL
fuser mode provides a fuser
temperature for optimum results on most
typical papers.
LOW
fuser mode provides a lower temperature,
which can help reduce curl on light-weight
paper. However, the toner might not adhere as
well to the page.
HIGH 1
fuser mode provides a higher fuser
temperature.
HIGH1
should be used with
rough-textured or heavy paper if you are having
trouble with toner adhering to the page.
HIGH 2
fuser mode uses the same higher
temperature as
HIGH 1
, but it also slows printer
throughput, which creates the best fusing for
very rough paper.
HIGH 2
is available only for
A4, Letter, and Legal sizes.
Paper Handling Menu (continued)
Item
Values
Explanation
EN
Printing Menu 213