
Printing cards, custom-size, and heavy paper
Custom-size paper can be printed from any tray. For paper
specifications, see “Paper specifications” on page 188.
The maximum paper weight is 199 g/m
2
(53 lb) from tray 1 and
105 g/m
2
(28 lb) from trays 2, 3, and 4.
Note
To prevent curl and other problems, heavy paper and very small
custom-size paper should be printed from tray 1 to the rear output bin.
Open the rear output bin to use it (see “Printing to the rear output bin”
on page 45).
The printer control panel can be set for one custom size at a time. Do
not load more than one size of custom paper into the printer.
Guidelines for printing custom-size paper
●
Do not attempt to print on paper smaller than 76 mm (3 in) wide
or 127 mm (5 in) long.
●
In the software application, set page margins at least 4.23 mm
(0.17 in) away from the edges.
●
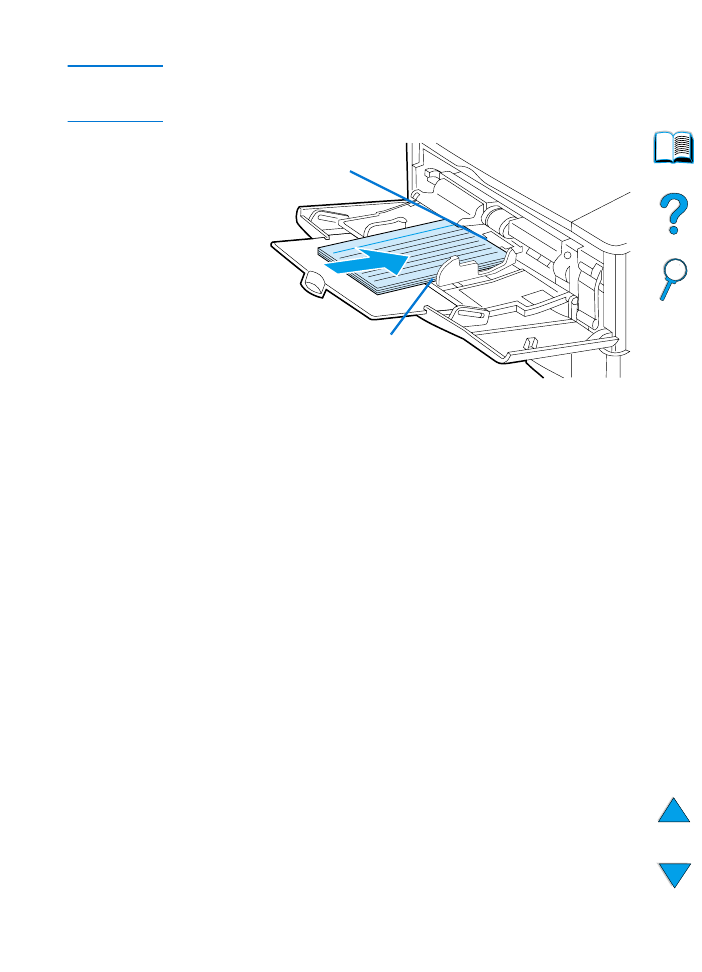
Feed short-edge first.
Setting custom paper sizes
When custom paper is loaded, size settings need to be selected from
the software application (the preferred method), the printer driver, and
the printer control panel.
Tray
Minimum size
Maximum size
Tray 1
76 by 127 mm
(3 by 5 in)
216 by 356 mm
(8.5 by 14 in)
Tray 2, 3, or 4
148 by 210 mm
(5.8 by 8.2 in)
216 by 356 mm
(8.5 by 14 in)
64 Chapter 2 - Printing tasks
EN
Note
Settings in the printer driver and software application override control
panel settings. (Software application settings generally override printer
driver settings.)
If the settings are not available from the software, set the custom
paper size from the control panel:
1
From the Printing Menu set
CONFIGURE CUSTOM PAPER=YES
.
2
From the Printing Menu, select inches or millimeters as the unit of
measurement.
3
From the Printing Menu, set the X dimension (the front edge of
the paper) as shown in the figure above. The X dimension can be
76 to 216 mm (3 to 8.5 in).
4
Set the Y dimension (the side edge of the paper) as shown in the
figure above. The Y dimension can be 127 to 356 mm (5 to 14 in).
For example, if the custom paper is 203 by 254 mm (8 by 10 in),
set X=203 mm and Y=254.
5
If custom paper is loaded into tray 1, set
TRAY 1 MODE=CASSETTE
and then set
TRAY 1 SIZE=CUSTOM
from the Paper Handling
Menu in the printer control panel. See “Customizing tray 1
operation” on page 69.
If custom paper is loaded in tray 2, 3, or 4, be sure the paper size
slider is set to Custom (see “Loading trays 2, 3, and 4” on
page 47).
X (front edge)
Y (side edge)
Feed short
edge first
EN
Advanced printing tasks 65