
Printing envelopes
With the optional envelope feeder, the printer will automatically feed
up to 75 envelopes. To order an envelope feeder, see “Ordering
information” on page 22. To print with the envelope feeder, see
“Feeding envelopes automatically (optional envelope feeder)” on
page 57. For envelope specifications, see “Envelopes” on page 197.
Many types of envelopes can be printed from tray 1. Up to 10 can be
stacked in the tray. Printing performance depends on the construction
of the envelope. Always test a few sample envelopes before
purchasing a large quantity.
●
In the software, set margins at least 15 mm (0.6 in) from the edge
of the envelope.
●
Open the rear output bin to get a straight paper path. This
produces better results if envelopes are curling.
If you print large quantities of envelopes continuously or if you
interleave envelopes with wide media, you might need to select
SMALL
PAPER SPEED = SLOW
at the printer control panel. This setting reduces
the throughput speed of narrow media to allow the heat generated
from printing this media to dissipate. Although using this feature will
slow your printer's throughput speed, it will help protect your printer
from damage while ensuring excellent print quality.
WARNING!
Never use envelopes with coated linings, exposed self-stick adhesives,
or other synthetic materials. These items can emit noxious fumes.
CAUTION
Envelopes with clasps, snaps, windows, coated linings, exposed self-
stick adhesives, or other synthetic materials can severely damage the
printer.
To avoid jamming and possible printer damage, never try to print on
both sides of an envelope.
Before you load envelopes, make sure they are flat and not damaged
or stuck together. Do not use envelopes with pressure-sensitive
adhesive.
56 Chapter 2 - Printing tasks
EN
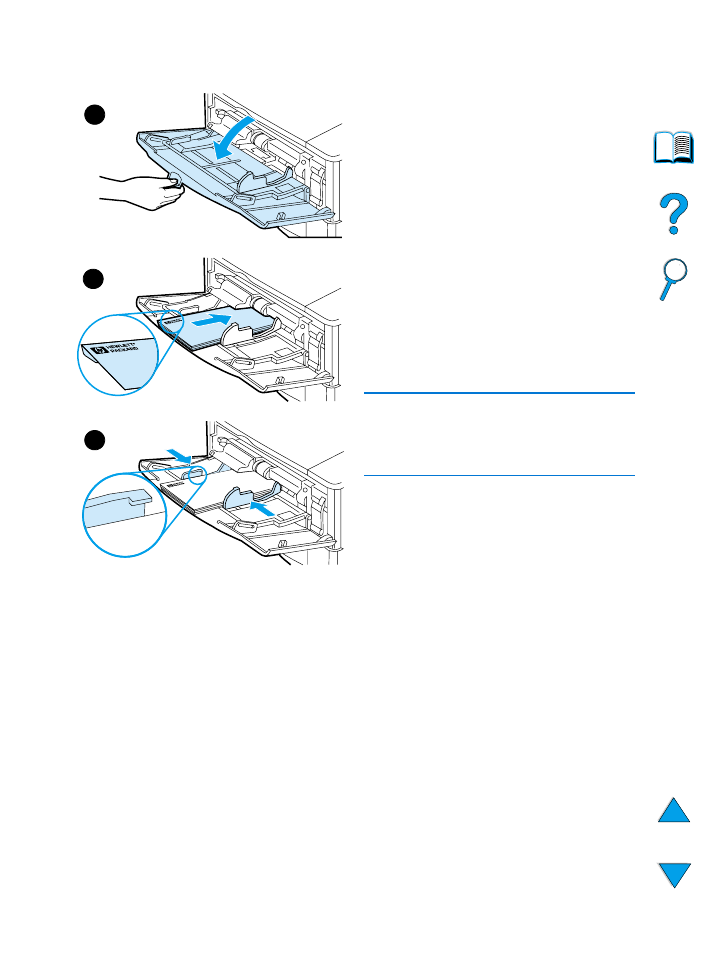
Loading envelopes in tray 1
1
Open tray 1, but do not pull out the
extension. (Most envelopes feed
best without the extension. However,
oversize envelopes might need the
extension.)
2
Load up to 10 envelopes in the
center of tray 1 with the side-to-be-
printed facing up, and the postage-
end toward the printer. Slide the
envelopes into the printer as far as
they will go without forcing them.
3
Adjust the guides to touch the
envelope stack without bending the
envelopes. Make sure the envelopes
fit under the tabs on the guides.
Note
If envelopes curl, use the rear output bin
(see “Printing to the rear output bin” on
page 45).
1
2
3
EN
Printing special paper 57
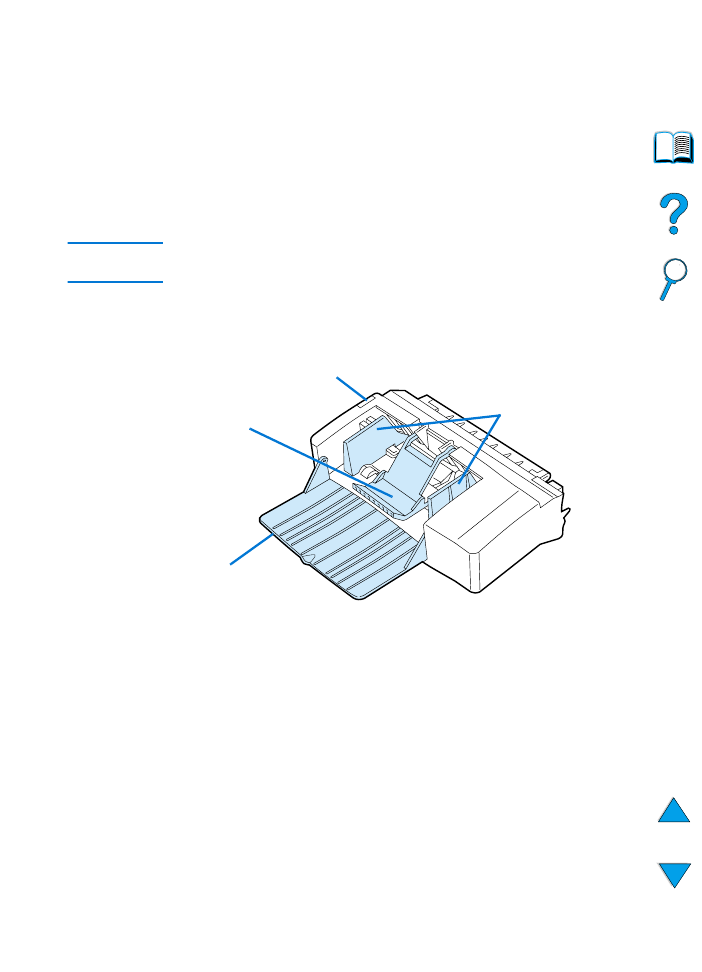
Feeding envelopes automatically (optional envelope
feeder)
With the optional envelope feeder, the printer will automatically feed
up to 75 envelopes. To print envelopes without an envelope feeder,
see “Printing envelopes” on page 55.
The envelope feeder supports only standard-size envelopes (see
“Supported sizes and weights of paper - optional envelope feeder” on
page 191).
Note
See the documentation included with the envelope feeder for
installation instructions.
You might need to configure the printer driver to recognize the
envelope feeder. See the printer driver online help for details.
Tray
extension
Guides
Envelope
weight
Release lever
58 Chapter 2 - Printing tasks
EN
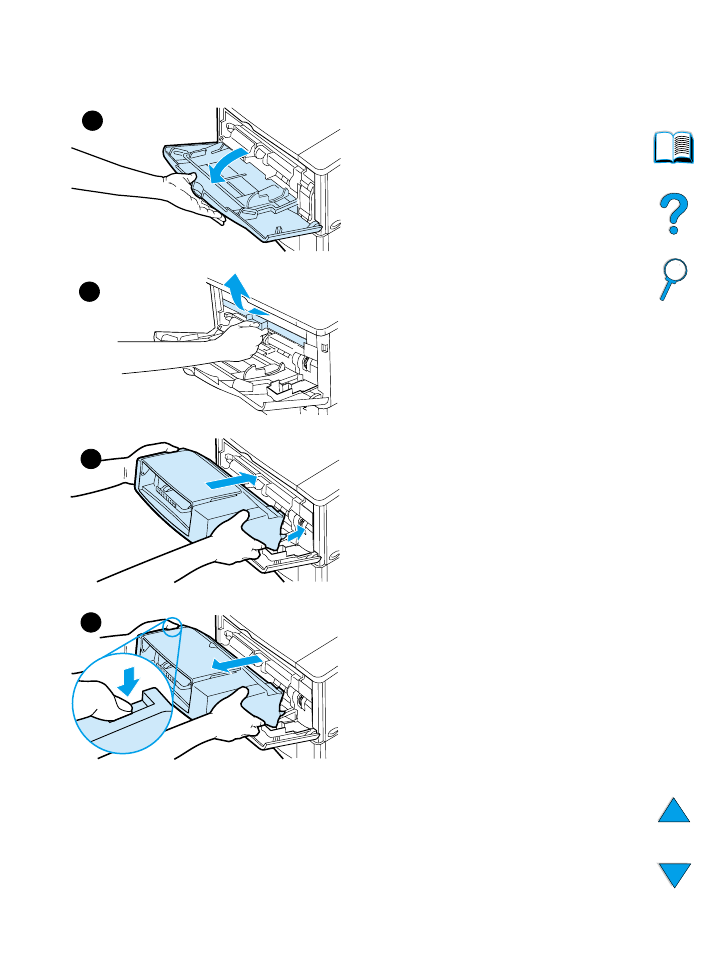
Inserting and removing the
envelope feeder
1
Open tray 1.
2
Remove the plastic cover from the
printer. (Replace the cover when the
envelope feeder is not attached.)
3
Insert the envelope feeder into the
printer until it locks into place. (The
connector on the top right side of the
envelope feeder fits into the plug in
the printer.) Pull gently on the
envelope feeder to be sure that it is
securely in place.
4
To remove the envelope feeder,
press the release button on the left
side and pull the envelope feeder
away from the printer.
1
2
3
4
EN
Printing special paper 59
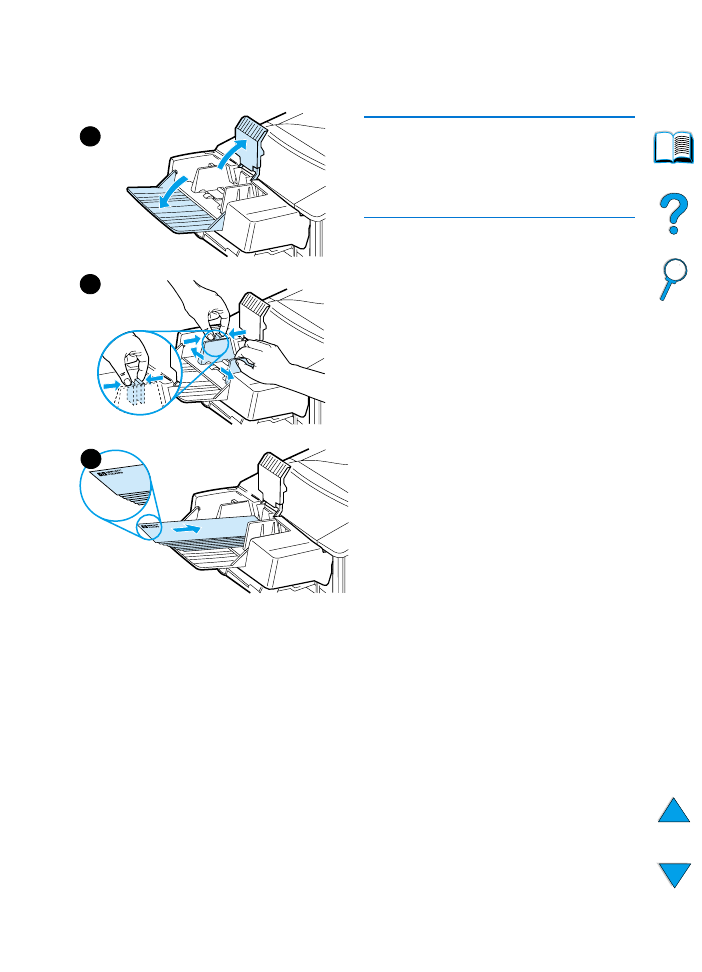
Loading envelopes in the
envelope feeder
Note
Print only on envelopes approved for use
in the printer (see “Printing envelopes”
on page 55 and “Envelopes” on
page 197).
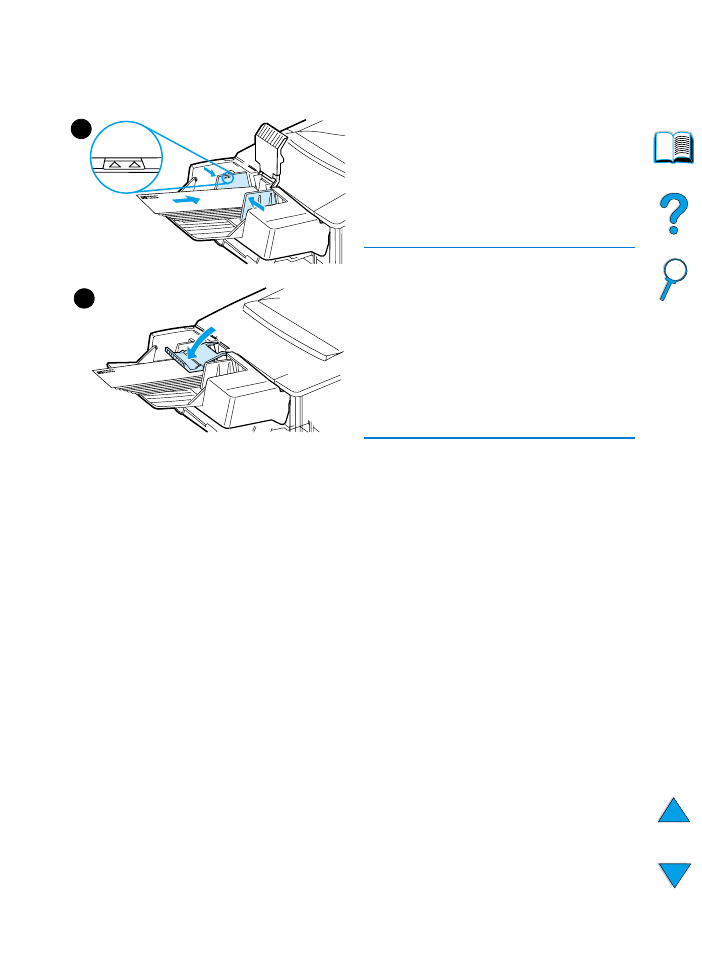
1
Fold down the tray extension. Lift the
envelope weight.
2
Squeeze the release lever on the left
envelope guide and slide the guides
apart.
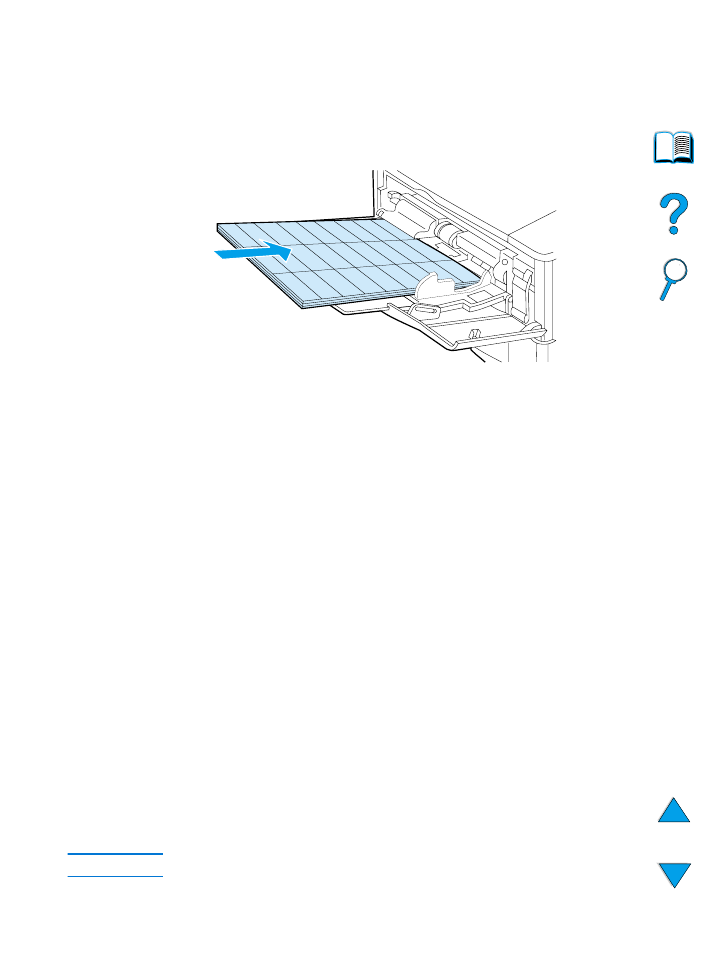
3
Load envelopes into the envelope
feeder with the side-to-be-printed
facing up, and the postage end
toward the printer. Push the
envelopes into the envelope feeder
as far as they will go without forcing
them. Push the bottom envelopes in
slightly farther than the top
envelopes. (Stack them as shown.)
Continued on the next page.
1
2
3
60 Chapter 2 - Printing tasks
EN
4
Adjust the guides to touch the
envelopes without bending them.
Make sure the envelope feeder is not
overfilled.
5
Lower the envelope weight onto the
envelopes.
Note
Select the envelope size from the
software application (if the setting is
available), the printer driver, and the
Paper Handling Menu in the printer
control panel (see “Paper Handling
Menu” on page 210). To print by type
and size of paper, see “Printing by type
and size of paper (locking trays)” on
page 70.
4
5
EN
Printing special paper 61