Clearing jams from the
fuser area
Use this procedure:
●
when paper has jammed inside the
fuser and cannot otherwise be
removed
●
when a page has torn while you
were trying to clear a jam from the
fuser
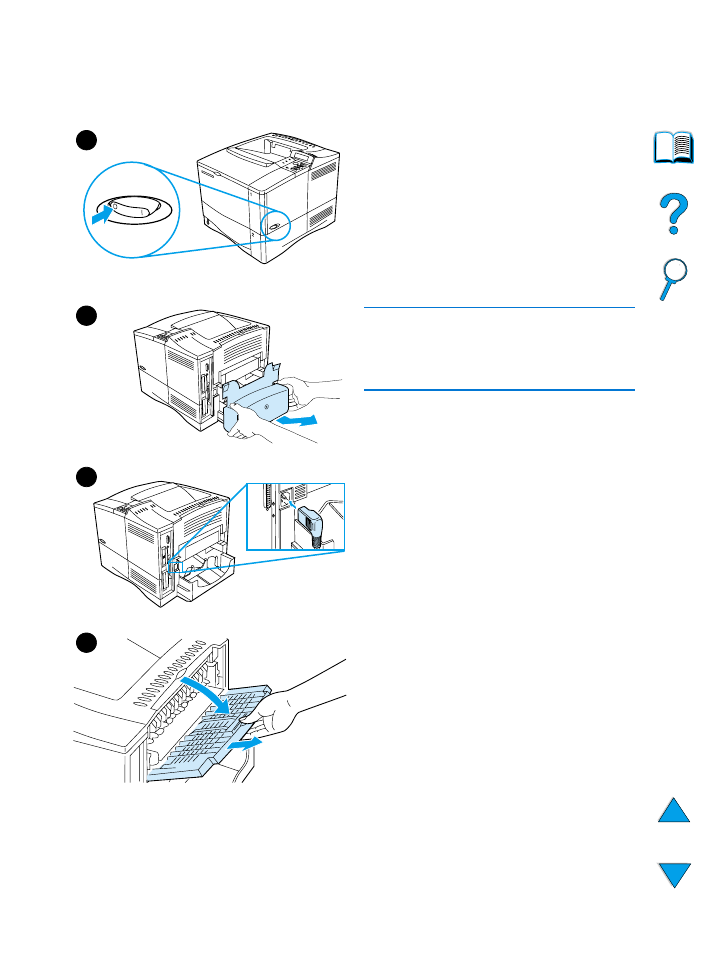
1
Turn the printer off.
WARNING!
To avoid minor burns, wait 30 minutes for
the fuser to cool before continuing with
this procedure.
2
Turn the printer so its rear cover
faces you and remove the tray 2 dust
cover or optional duplexer.
3
Unplug the power cord from the
printer.
4
Open the rear output bin and pull the
extension out.
Continued on the next page.
1
2
3
4
108 Chapter 4 - Problem solving
EN
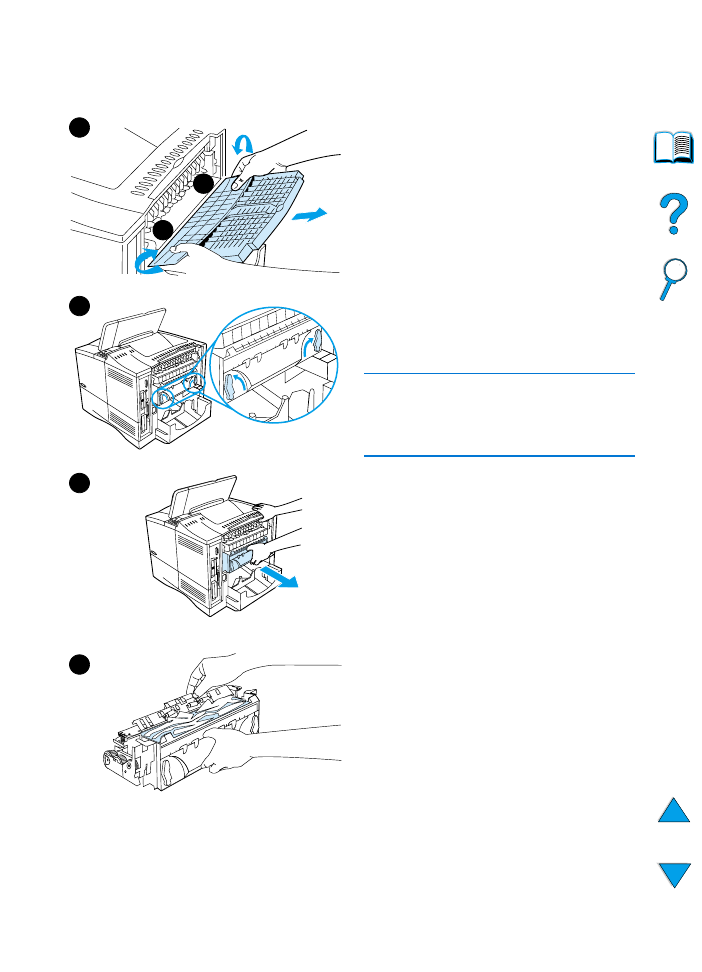
5
Remove the rear output bin and
extension. To do this, bend the
middle down slightly, release tab 1
and then release tab 2.
6
Unlock the fuser by rotating the blue
fuser levers so that they point up.
7
Pull the fuser out of the printer. To
release the fuser from the printer,
hold the back of the printer while
pulling on the fuser. Do not pull on
the black plastic flapper.
8
Remove the paper that has jammed.
CAUTION
Do not use a sharp object to clear paper
from the fuser area. You might damage
the fuser.
Continued on the next page.
5
6
7
8
1
2
EN
Clearing paper jams 109
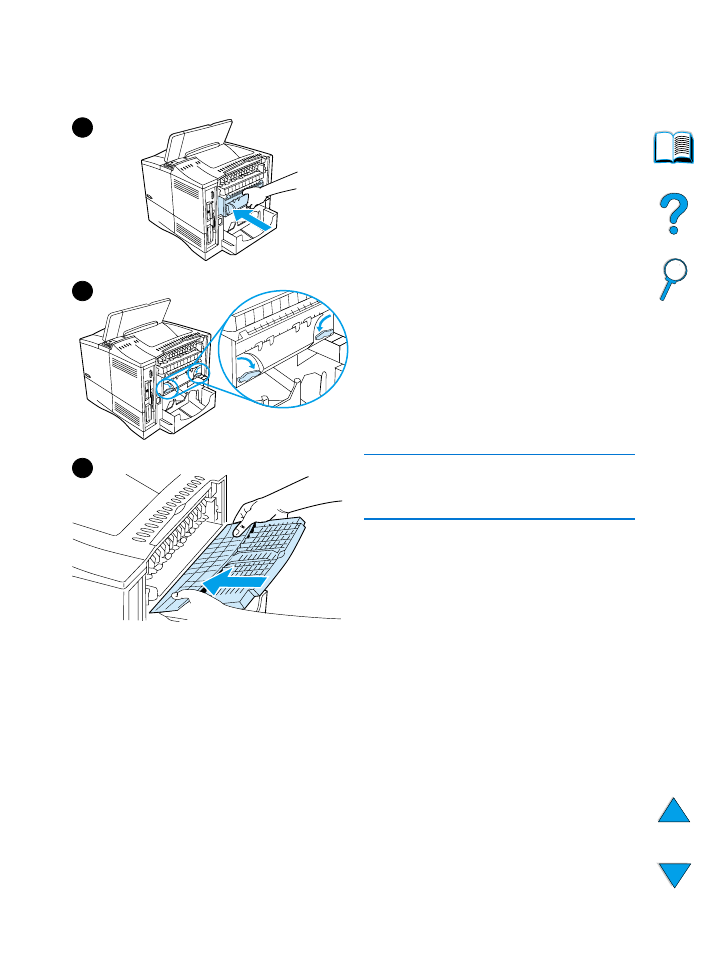
9
Replace the fuser, left side first. Be
sure to push the fuser firmly into the
printer.
10 Lock the fuser in place by rotating
the levers to the horizontal position.
11 Replace the rear output bin, left side
first.
12 Plug the power cord into the printer.
13 Replace the tray 2 dust cover or the
optional duplexer.
14 Turn the printer back on.
15 If a paper jam message persists,
there is still paper in the printer. Look
for paper in another location (see
“Paper jam locations” on page 97).
Note
Since the printer has been turned off,
you will need to send the print job again.
9
10
11

110 Chapter 4 - Problem solving
EN