
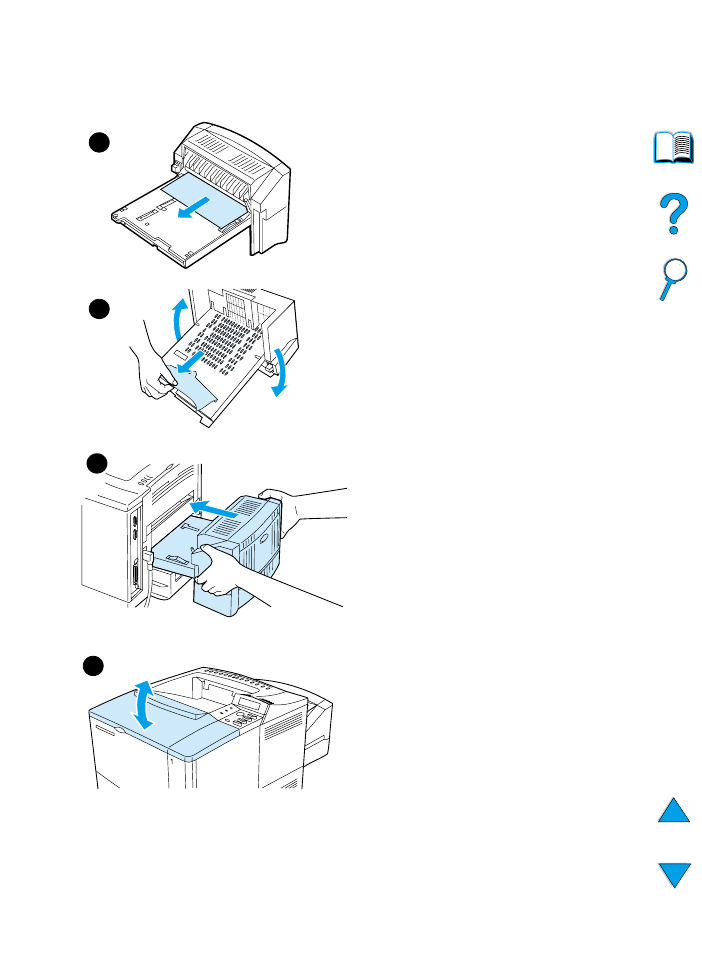
Clearing jams from the
optional duplexer
1
Open the duplexer’s rear door.
2
Slowly pull any paper out of the
duplexer.
3
Remove the duplexer by lifting it
slightly and pulling it out of the
printer.
4
From the rear of the printer, remove
any paper on top of tray 2. (You
might need to reach inside the
printer.)
Continued on the next page.
1
2
3
4
EN
Clearing paper jams 105
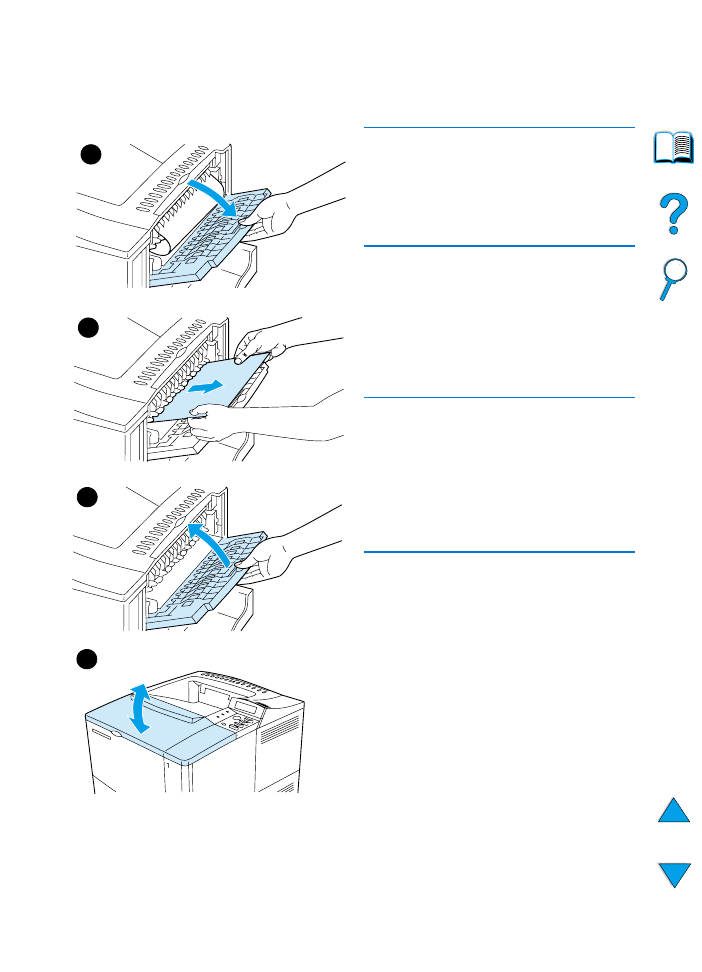
5
Slowly pull any paper out of the
duplexer.
6
Turn the duplexer over and remove
any paper.
7
Insert the duplexer into the printer.
8
Open and close the top cover to
clear the paper jam message.
9
If a paper jam message persists,
there is still paper in the printer. Look
for paper in another location (see
“Paper jam locations” on page 97).
5
6
7
8
106 Chapter 4 - Problem solving
EN